Ubuntu 安装 GitLab,并配置 Certd 证书流水线
679人浏览 / 0人评论
官方文档:https://docs.gitlab.com/install/package/ubuntu/?tab=Community+Edition
官方软件仓库:https://packages.gitlab.com/app/gitlab/gitlab-ce/search?dist=ubuntu&filter=all&page=2&q=17.10
Ubuntu 操作
安装ssh
sudo apt update
sudo apt install openssh-server -y
sudo systemctl enable --now ssh
启用root
# ssh启用root登录
sudo -i
vim /etc/ssh/sshd_config
PermitRootLogin yes
PasswordAuthentication yes
# 设置root密码
passwd root
# 重启ssh
systemctl restart ssh开放端口
开放端口:
sudo ufw allow 22/tcp
sudo ufw allow 80/tcp
sudo ufw allow 443/tcp
sudo ufw allow 22001/tcp
sudo ufw allow 7001/tcp
sudo ufw allow 7002/tcp
sudo ufw enable
启用rc.local
将rc-local.service文件复制到system目录下
cp /usr/lib/systemd/system/rc-local.service /etc/systemd/system/新建rc.local文件
touch /etc/rc.local
chmod 755 /etc/rc.local
vim /etc/rc.local
内容如下:
#!/bin/bash

exit 0
说明:
# 第一行必须是 #!/bin/bash(或 #!/bin/sh),声明解释器,最后一行必须是 exit 0,表示脚本成功退出。缺了它,系统可能卡住或跳过后续启动步骤。
# 在这两行中间添加需要执行的命令,所有命令路径必须写绝对路径;
# 检查语法是否正确:sudo bash -n /etc/rc.local
# 手动触发执行:sudo /etc/rc.local
# 可以考虑加入日志记录:
echo "[$(date)] rc.local started" >> /var/log/rclocal.log
your_command >> /var/log/rclocal.log 2>&1
echo "[$(date)] rc.local finished" >> /var/log/rclocal.log
示例:
#!/bin/bash

# 开机启用无线网卡并配置IP
rfkill unblock wifi
sleep 2
ifconfig wlan0 up
ifconfig wlan0 192.168.1.100 netmask 255.255.255.0

exit 0
设置开机启动rc-local
systemctl start rc-local
systemctl enable rc-local
reboot

# 检查状态
systemctl status rc-local
GitLab安装
# 下载指定版本:
wget --content-disposition https://packages.gitlab.com/gitlab/gitlab-ce/packages/ubuntu/noble/gitlab-ce_17.10.3-ce.0_amd64.deb/download.deb

# 安装:
dpkg -i gitlab-ce_17.10.3-ce.0_amd64.deb

# 初始化:
gitlab-ctl reconfigure
gitlab.rb文件配置
external_url 'https://gitlab.jbritian.com'

# 本地部署+内网穿透时,此处配置为22001,内网穿透local_port=22,如果是云服务器,则无需配置
gitlab_rails['gitlab_shell_ssh_port'] = 22001

nginx['redirect_http_to_https'] = true
nginx['redirect_http_to_https_port'] = 80
nginx['ssl_certificate'] = "/root/certs/gitlab.jbritian.com_bundle.crt"
nginx['ssl_certificate_key'] = "/root/certs/gitlab.jbritian.com.key"
nginx['listen_port'] = 443
nginx['proxy_set_headers'] = {
   "Host" => "$http_host_with_default",
   "X-Real-IP" => "$remote_addr",
   "X-Forwarded-For" => "$proxy_add_x_forwarded_for",
   "X-Forwarded-Proto" => "https",
   "X-Forwarded-Ssl" => "on",
   "Upgrade" => "$http_upgrade",
   "Connection" => "$connection_upgrade"
}

gitlab_rails['smtp_enable'] = true
gitlab_rails['smtp_address'] = "mail.jbritian.com"
gitlab_rails['smtp_port'] = 465
gitlab_rails['smtp_user_name'] = "xxxxxxxxx@jbritian.com"
gitlab_rails['smtp_password'] = "xxxxxxxxxx"
gitlab_rails['smtp_domain'] = "mail.jbritian.com"
gitlab_rails['smtp_authentication'] = "login"
gitlab_rails['smtp_enable_starttls_auto'] = false
gitlab_rails['smtp_tls'] = true
gitlab_rails['gitlab_email_from'] = 'xxxxxxxxx@jbritian.com'
gitlab_rails['smtp_openssl_verify_mode'] = 'none'

gitlab_rails['incoming_email_enabled'] = true
gitlab_rails['incoming_email_address'] = "incoming+%{key}@gitlab.jbritian.com"
gitlab_rails['incoming_email_email'] = "incoming"
gitlab_rails['incoming_email_password'] = "xxxxxxxxxxxx"
gitlab_rails['incoming_email_host'] = "gitlab.jbritian.com"
gitlab_rails['incoming_email_port'] = 143
gitlab_rails['incoming_email_ssl'] = false
gitlab_rails['incoming_email_start_tls'] = false
gitlab_rails['incoming_email_mailbox_name'] = "INBOX"
gitlab_rails['incoming_email_idle_timeout'] = 60
gitlab_rails['incoming_email_delete_after_delivery'] = true
gitlab_rails['incoming_email_expunge_deleted'] = true

gitlab_pages['enable'] = true
pages_external_url "https://pages.jbritian.com/"
pages_nginx['redirect_http_to_https'] = true
pages_nginx['ssl_certificate'] = "/root/certs/fullchain.pem"
pages_nginx['ssl_certificate_key'] = "/root/certs/privkey.pem"
gitlab_rails['pages_path'] = "/var/opt/gitlab/gitlab-rails/shared/pages"
frpc.ini
[common]
server_addr = xxx.xxx.xxx.xxx
server_port = 7000
token = xxxxxxxxx
pool_count = 10

[gitlab_https2https]
type = https
custom_domains = gitlab.jbritian.com
plugin = https2https
plugin_local_addr = 127.0.0.1:443
plugin_crt_path = /root/certs/gitlab.jbritian.com_bundle.crt
plugin_key_path = /root/certs/gitlab.jbritian.com.key
use_encryption = true
use_compression = true

[pages_https2https]
type = https
custom_domains = pages.jbritian.com
plugin = https2https
plugin_local_addr = 127.0.0.1:443
plugin_crt_path = /root/certs/fullchain.pem
plugin_key_path = /root/certs/privkey.pem
use_encryption = true
use_compression = true

[*.pages_https2https]
type = https
custom_domains = *.pages.jbritian.com
plugin = https2https
plugin_local_addr = 127.0.0.1:443
plugin_crt_path = /root/certs/fullchain.pem
plugin_key_path = /root/certs/privkey.pem
use_encryption = true
use_compression = true

[port-22001]
type = tcp
local_ip = 127.0.0.1
# 注意,虽然gitlab ssh端口配置为22001,此处仍需配置为22,否则无法使用ssh进行操作
local_port = 22
remote_port = 22001
use_encryption = true
use_compression = true
从备份文件恢复
# 停止相关服务
gitlab-ctl stop unicorn
gitlab-ctl stop sidekiq

# 修改备份文件权限
chmod 777 /var/opt/gitlab/backups/1530156812_2018_06_28_10.8.4_gitlab_backup.tar

# 执行恢复
sudo gitlab-rake gitlab:backup:restore BACKUP=1530156812_2018_06_28_10.8.4

# 注意,每次执行 gitlab-ctl reconfigure 后都会出现 nginx http2 问题;
## 解决方式:
## vim /var/opt/gitlab/nginx/conf/gitlab-pages.conf
## vim /var/opt/gitlab/nginx/conf/gitlab-http.conf
listen 443 ssl;
http2 on;
## 修改完后使用 gitlab-ctl start 启动或使用 gitlab-ctl restart 重启

# gitlab启动
gitlab-ctl start
安装Certd
官方文档:https://certd.docmirror.cn/guide/install/source/
安装nvm
curl -o- https://raw.githubusercontent.com/nvm-sh/nvm/v0.40.4/install.sh | bash
source ~/.bashrc
nvm install 22.22.0
nvm use 22.22.0
安装所需命令工具
sudo apt install unzip
sudo apt install git
安装Certd
克隆代码
git clone https://github.com/certd/certd --depth=1
cd certd
修改 start.sh
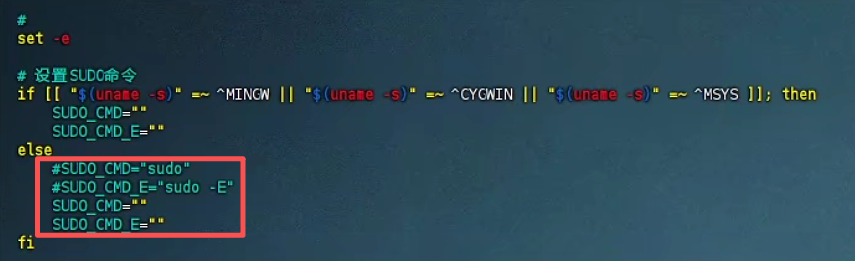
启动服务
./start.sh

# 如果pnpm禁止了某些包的安装
pnpm config set ignore-scripts false

# 数据默认保存在 ./packages/ui/certd-server/data 目录下,建议配置一条数据库备份流水线,自动备份。
# 访问地址:
## http://your_server_ip:7001
## https://your_server_ip:7002
## 默认账号密码:admin/123456 记得修改密码
## 测试没问题后,停止certd:kill -9 $(lsof -t -i:7001)
配置开机自启动
1、进入构建目录:
cd /root/certd/packages/ui/certd-server2、创建启动脚本:
vim just_run.sh内容如下:
#!/bin/bash
cd /root/certd/packages/ui/certd-server
nohup pnpm run start > certd.log &
授权:
chmod 777 just_run.sh3、添加到rc.local:
vim /etc/rc.local内容如下:
#!/bin/bash
/root/certd/packages/ui/certd-server/just_run.sh

exit 0
4、启动certd:
/etc/rc.local腾讯云API密钥
https://console.cloud.tencent.com/cam/capi


 豫公网安备 41010702003051号


全部评论